How to let your user create their own ad units?

Step 1: Select Manage Advertiser from the menu on the Dashboard.


dashboard_managead_ma

Step 2A: In the Advertiser list, click on the Toggle Button to toggle the access  from  No to Yes.

manageadvertiser_ma


Step 2B: Alternatively, you can give access to multiple Advertisers in bulk by selecting the checkboxes of the Advertiser(s) that you want to give access to. A selection box will appear where you can select Yes orNo.

multipleaccess_ma


Step 3: After selecting Yes either using Toggle Button (Step 2A) or Checkboxes (Step 2B), a pop up message will appear informing you that the access has been granted and you may send the Ad Creator Link to your Advertiser(s).


acceschange_rma

Step 4: You may now start sending the Ad Creator Link to your Advertiser by clicking the Send Ad Creator Link below the Toggle Button.


sendadcreatorlink_ma

Step 5: Finally, a pop up message will appear informing you that the email containing the Ad Creator Link has been sent to your Advertiser’s email.


emailnotif_ma


Why White Label Under Your Own Brand?

White label the platform under your own brand to remove our branding. This makes it easier for you to share the platform access to your own clients without exposing our brand to them.

This is what you get with our White Label?

Your Own Logo
You can upload your own brand logo which will be used across the platform replacing our logo.

Your Own Domain
Access the platform and send Ad preview links to your client using your own domain name.

Your Own Ad Gallery
Access our Ad Gallery using your own custom domain. You can use it as sales demo or even in your own media kit.

Client Reporting Dashboard Access
Give your client access to the reporting dashboard so they can check the report themselves, under your brand.

Client Ad Creator Access
Give your client access to the Ad Creator to create their own Ad, under your brand.
Don’t worry. They will need to submit the created Ad back to you to run it live.

Click here to learn how to white label under your brand.

Third Party External Tracker

Sometimes you may want to use an external tracker to also track certain metrics in our ad tag. Our ad tag support external trackers to track a few of the standard metrics. Let’s explore some of these trackers below.

5 Types of External Tracker

  1. Impression Tracker
    • A tracker that triggers as soon as the ad is loaded
    • This tracker triggers in the background and user will not notice when this tracker triggers
    • Using this tracker, you can track how many times the ad is loaded and shown to the user
  2. Click Macro
    • A tracker that act as the landing page URL that opens in the browser when user clicked on the ad to go to landing page
    • So instead of opening the actual landing page that is set during the ad creation, the click macro is being opened instead
    • Click macro will accept the actual landing page URL as a parameter and will do a redirection to the actual landing page once the click is tracked
    • Click macro comes in 3 different formats such as below (do check with your click macro provider on which format to use):-
      • Non Escaped Macro – macro with url that is not encoded (i.e http://mobileads.com)
      • Single Escaped Macro – macro with url that is encoded only once (i.e http%3A%2F%2Fmobileads.com)
      • Double Escaped Macro – macro with url that is encoded twice (i.e http%253A%252F%252Fmobileads.com)
    • Using this tracker, you can track how many times user click on the ad that brings them to the landing page
  3. Clickthrough Tracker
    • Similar to a click macro where this tracker triggers when user click to landing page
    • However, this tracker triggers in the background, unlike click macro which opens the tracker url in the browser
    • Use this tracker if the click macro provided by your provider does not support redirection to landing page
  4. Click-To-Expand Tracker
    • A tracker that triggers when user click on a teaser banner to expand the ad
    • This tracker triggers in the background and user will not notice when this tracker triggers
    • Only applicable for Expandable Ad
    • Using this tracker, you can track how many times user click on a teaser banner to view it’s expanded content
  5. Tab Click Tracker
    • A tracker that triggers when user click on any tab in the ad
    • This tracker triggers in the background and user will not notice when this tracker triggers
    • Using this tracker, you can track which tab is being clicked the most and which tab performs best

Tracker Variations

Tracker comes in 3 different variations such as below:-

  1. Standard URL
    • This is the most basic format
    • i.e http://track.domain.com?id=123
  2. Macro
    • This is a placeholder URL that will be replaced with an actual URL in real time during ad serving
    • i.e {tracker_macro} which will then be replaced into http://track.domain.com?id=123 during ad serving
  3. Combination of Standard URL + Macro
    • A combination of a standard URL and a macro in some part of the url
    • The macro in the url will then be replaced with an actual value in real time during ad serving
    • i.e http://track.domain.com?id={tracker_id} which will then be replaced into http://track.domain.com?id=123

Embed Ad Creator

Embed Ad Creator is one of our embed tools where you can embed our ad creator into your platform. This allow your user to create a rich media ad using our tool without leaving your platform.

To use our embed ad creator, you will need to embed our code snippet inside your platform and do some minimal coding works to integrate and communicate with it.

Technical Specification

Code Snippet:

<script src=”http://www.mobileads.com/mad/rma-studio?access_token=&campaignSupport=1&embedded=1&callbackType=GET&callbackURL=about:blank” type=”text/javascript”></script>

Required Parameters:

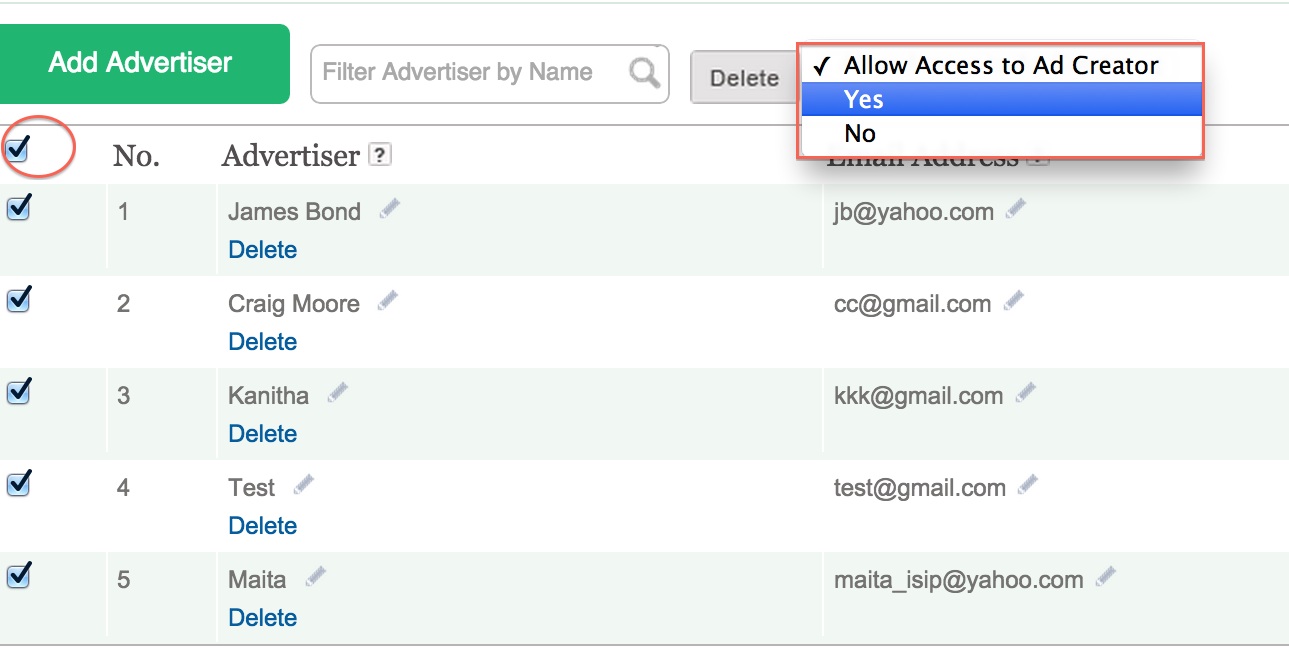
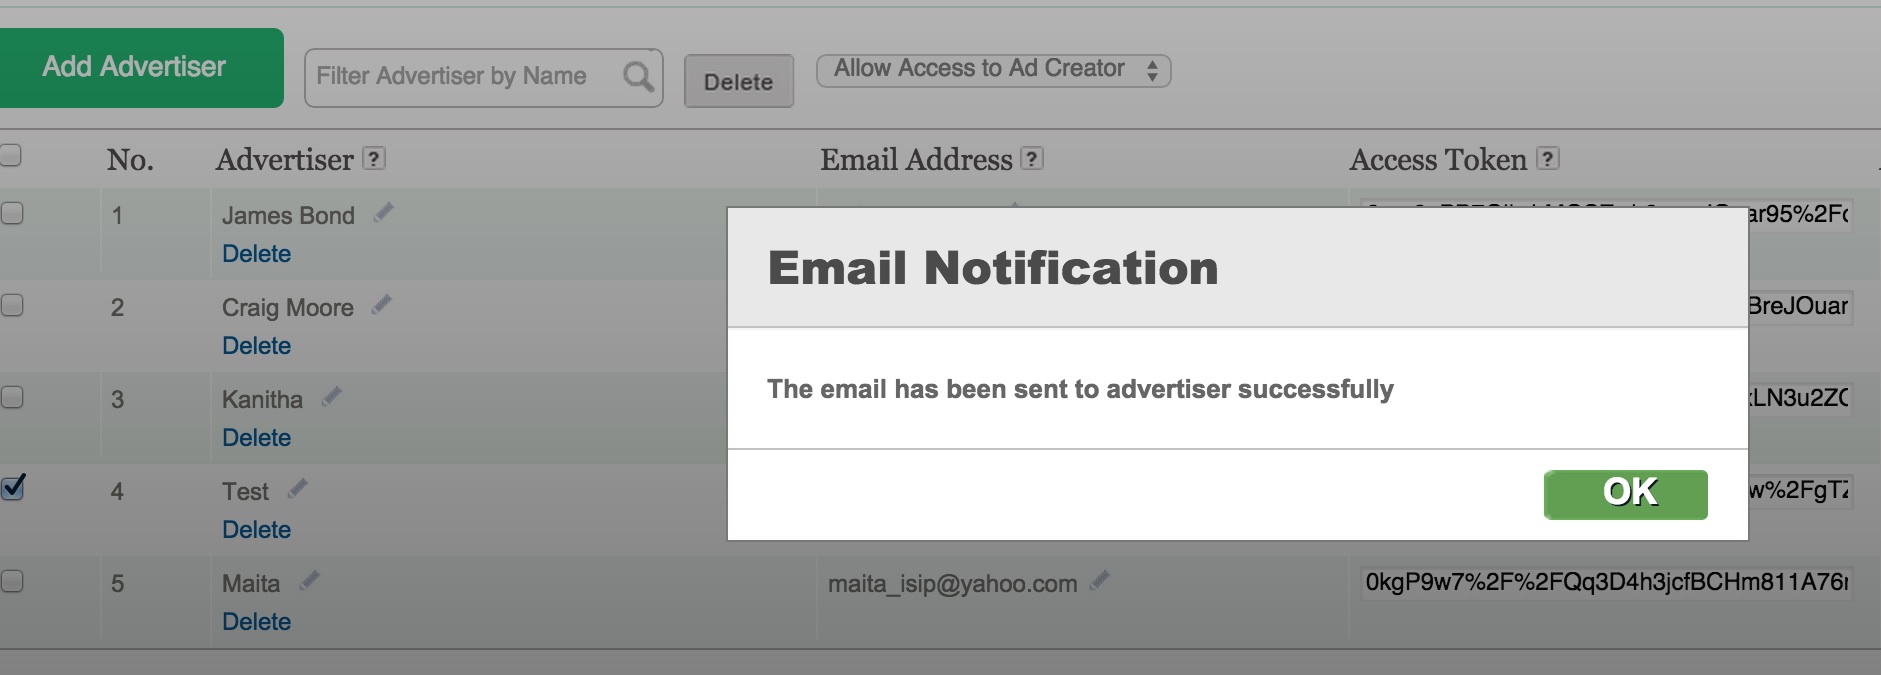
  • access_token: sub-account access token is needed to let us determine which sub-account is creating the ad
  • callbackURL: the url that will be called after an ad is successfully created in the ad creator
    • This is an implementation in your server to receive a callback from the ad creator where it will pass in the ad tag along with other information specific to the ad
    • Your server will need to capture and save these information into your own database
    • The callback will need to handle the redirect as well (i.e after the ad is saved, where should the user be redirected to)
  • callbackType: the type of callback your server support (i.e GET or POST)

Optional Parameters:

  • adSize: specify the default ad size that you want to display (your user will not be able to change to different ad size). i.e 300×250
  • p: specify the platform of the ad created (MA is for MRAID, MW is mobile web and DK is for desktop. if you specify MA, the ad created will be MRAID compliant)
  • af: specify the ad format of the created ad (EMD is static ad size, EXP is expandable and IST is interstitial)
  • studioId: this is the unique id to identify an ad created using our ad creator
    • This is also one of the ad details we will send back to you during callback
    • Store this id and pass it back as a parameter to allow your user to edit the ad again
    • Adding the studioId parameter will trigger the edit mode of our embed ad creator

Callback URL Specification

As mentioned, this is an implementation in your server where you developer need to prepare a call for our ad creator to call and pass in information of the created ad. You can specify the callback type (GET or POST) using the callbackType parameter.

When adding in your callback url into our code snippet, ensure that the callback url is in encoded format.

Sample non-encoded format (this is incorrect version): http://yourdomain.com/callback?xxx

Sample encoded format (this is the correct version): http%3A%2F%2Fyourdomain.com%2Fcallback%3Fxxx

When calling to your callback url, these are the information that we will be sending to you:

  • studioId: this is the unique id in our platform to identify the created ad
  • adName: this is the name your user entered in our ad creator
    • This will allow your platform to show the same name that was entered in our ad creator
  • adTag: this is the resulting ad tag which will be used to traffic the created ad

New Sub-Account Creation

When using our embed tools such as the ad creator and report, there is a need to determine who is the sub account that is using these tools. This is because each sub account should only have access to their own data and not data from other sub-accounts.

Before allowing any of your user to use our embed tools, you will first create a sub-account for them using this API. When a sub- account is successfully created, you will receive a unique sub-account id as well as their sub-account access token. This access token needs to be passed in when calling to our embed tools to determine who is using the tools.

Technical Specification

HTTP Type: POST

API URL: http://www.mobileads.com/mad/rma-add-user

Required Parameters:

  • access_token: the partner access token that you get from us
  • name: the name of the sub-account
  • email: the email address if your sub-account (this is the unique identifier of each sub-account)

Response Format

Successful call response

{
“status”:”successful”,
“userId”:xx,  //unique sub-account id
“accessToken”:”xxxx” //unique sub-account access token
}

Failed call response

{
“status”:”failed”,
“message”:”error message”
}

Additional Details

Upon successful sub-account creation, do store the returned user id and sub-account access token in your own database and associate with your own user’s details.

Ad Tag Retrieval

This API allow you to retrieve the ad tag for any ad that is created by your users. Although we do have the callback support in our embed ad creator where we will pass the generated ad tag back to your platform, this API provides another way for your platform to retrieve the ad tag without having to prepare a callback when using the embed ad creator.

Technical Specification

HTTP Type: GET

API URL: http://www.mobileads.com/mad/get-ad-tag

Required Parameters:

  • access_token: the partner access token that you get from us
  • studioId: unique id to identify an ad created using our ad creator
    • This is the unique id that you receive from our embed ad creator callback
    • This will retrieve only ONE ad tag with the specified studioId

Response Format

Successful call response

{
“status”: true,
“message”: “”,
“result”: {
“width”: 300, //width of the ad
“height”: 250, //height of the ad
“adFormat”: “EXP”, //ad format of the ad (EXP-Expandable, IST-Interstitial, EMD-Static ad size like mrect)
“script”: “” //ad tag of the ad
}
}

Failed call response

{
“status”:false,
“message”:””
}

API Introduction

MobileAds API is prepared as a way for our partner to embed some of our tools into their own platform as well as basic data retrieval and manipulation. There are a few key things to note when using our API such as below:-

  • To access the API, you will need to get your access token from us
  • There are 2 different type of access token
    • Main account access token
    • Sub-account access token

Main Access Token

This access token will be provided to you once you are a verified partner. This access token will give you access to retrieve data as well as to manipulate data in our platform.

Here’s a list of available API calls (all these uses the main access token):-

Sub-account Access Token

This access token is returned when you are creating a new sub-account using our API. You will need to store this access token in your own database. Thia access token is used when calling to our embedded tools to help determine which sub-account is accessing the embedded tools.

Here’s a list of embeddable tools (all these uses the sub-account access token):-

If you are interested to integrate with our platform using our API, please feel free to contact your account manager or send an email to our support team at [email protected].

To Delete Cookies of our website from Firefox

1. From the Firefox button or the Tools menu return to Options – Privacy panel.

2. Select Firefox will: Use custom settings for history.

3. Click the Show Cookies button.

0201-clear browsing data-FF


4. Use the search box to enter the name of the website or drill down the folder lists to locate the website whose cookies you want to delete.

5. Select the cookie in the located list and click on Remove Cookie.

0202-clear browsing data-FF