Ad Tag is a script that is used to serve out the Ad created using our Ad Creator.
Using our Ad Tag generator, you can easily create Ad Tag that is already compatible with many of our supported DSPs/Ad Exchanges/Ad Networks.
Below is a simple anatomy of our Ad Tag Generator.
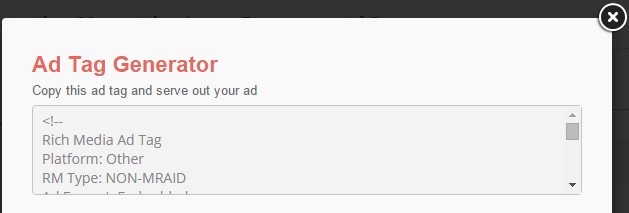
Part 1: Generated Ad Tag
At the top of the generator is your Ad Tag. This is the Ad Tag that you should copy and use in those DSPs/Ad Exchanges/Ad Networks.
Part 2: Inventory Setting
This is where you set options related to how and where you want the Ad to be served.
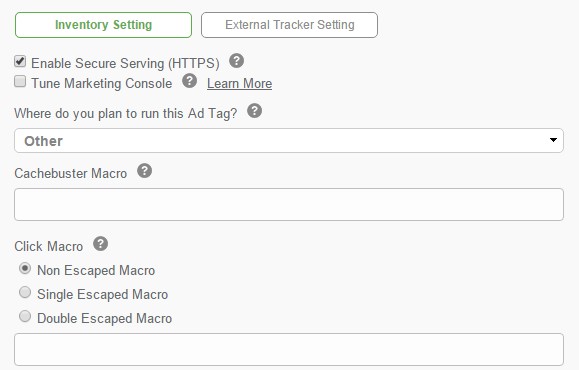
- Enable Secure Serving (HTTPS)
- Secure serving is required in secure website such as website that is loading using HTTPS instead of HTTP in their domain.
- Enabling this will allow you to serve your ad in both non-secure and also secure website and thus widen your ad campaign’s reach.
- Tune Marketing Console (TMC)
- Tune is one of our partner for attribution tracking.
- If you already have an account with TMC and would like to use its attribution tracking, then please check this option.
- If you do not have a TMC account, you can learn more about TMC here.
- Platform Selection
- Specify which platform you plan to run this Ad Tag in (DSPs/Ad Exchanges/Ad Networks).
- We have a list of supported platforms you can select from and once selected, all the necessary options and tracking macros will be optimized for the selected platform.
- This will allow both our platform and the selected platform to track data more accurately and reduce discrepancies.
- Cachebuster Macro
- This is a placeholder that will be generated in real time during ad serving.
- This is important to ensure ad is not cache in browser and affect tracking accuracy.
- Will automatically filled in when selecting a supported platform.
- Click Macro
- This is also a placeholder that will be generated in real time during ad serving.
- This is to allow the DSPs/Ad Exchanges/Ad Networks to also track clickthrough on the Ad.
- Will automatically filled in when selecting a supported platform.
Part 3: External Tracking Setting
This is where you set any third party external tracker that you would like to use with the Ad. Some brands may require a third party tracking platform to be used to track certain metrics as to counter-check for discrepancy. Learn more about how to use external tracker here.
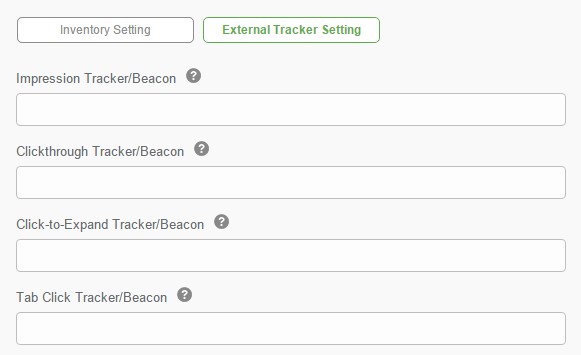
- Impression Tracker/Beacon
- Insert the URL of the tracker here to track impression of the Ad.
- This tracker will fire when the Ad is loaded.
- Clickthrough Tracker/Beacon
- Insert the URL of the tracker here to track click to landing page that happens within the Ad.
- This tracker will fire when an audience clicks anywhere within the Ad that brings them to a landing page.
- Click-to-Expand Tracker/Beacon
- Insert the URL of the tracker here to track click to expand for Expandable Ad.
- This tracker is fired when an audience click on the teaser banner to expand the Ad.
- Tab Click Tracker/Beacon
- Insert the URL of the tracker here to track click on the tab within Ad.
- This tracker is fired when an audience click on any of the tab within the Ad to view the tab’s content.
Part 4: Generate Ad Tag
Finally, click on the Generate Ad Tag button to generate the Ad Tag. You can then copy the generated Ad Tag and use it in the selected DSPs/Ad Exchanges/Ad Networks.

If you faced with any issues during the ad tag generation or if you would like to use the ad tag in an unsupported platform, please contact your account manager or send us a message at [email protected].