No. We do not keep track of those who claimed your coupon.
Is there a report showing the number of coupons claimed?
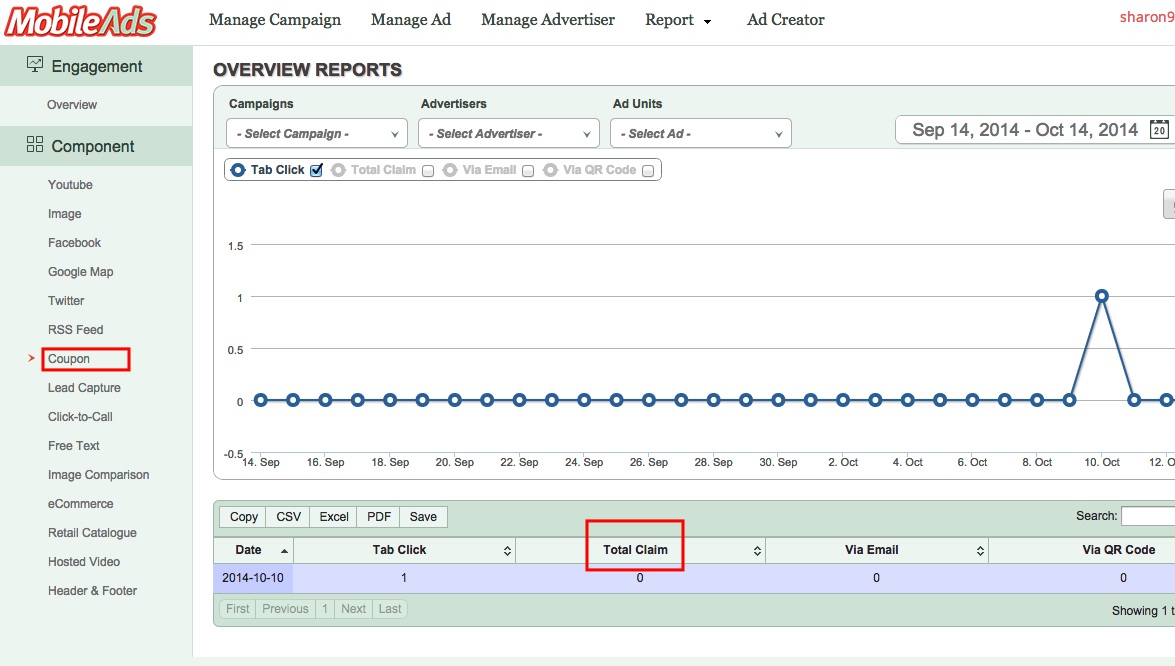
Yes. Our Analytic Report will show the number of coupons being claimed.

You can view the report from our Overview Reports-Component-Coupon.
Can I put in any image as the background of the coupon?
Yes, you can upload an image for your coupon.
We only support .jpg, .gif, .png and .bmp file format for the time being.
It is recommended to use JPEG (.jpg) format for best compatibility.
Step-By-Step: Coupon Component
Step 1: Choose Coupon Component in the component selection.

Step 2: From Edit Panel, type the tab name and Click the Upload Images

Step 3.1: On Gallery, select the image that you want to upload. Click the uploaded image and click on Add Selected File button.

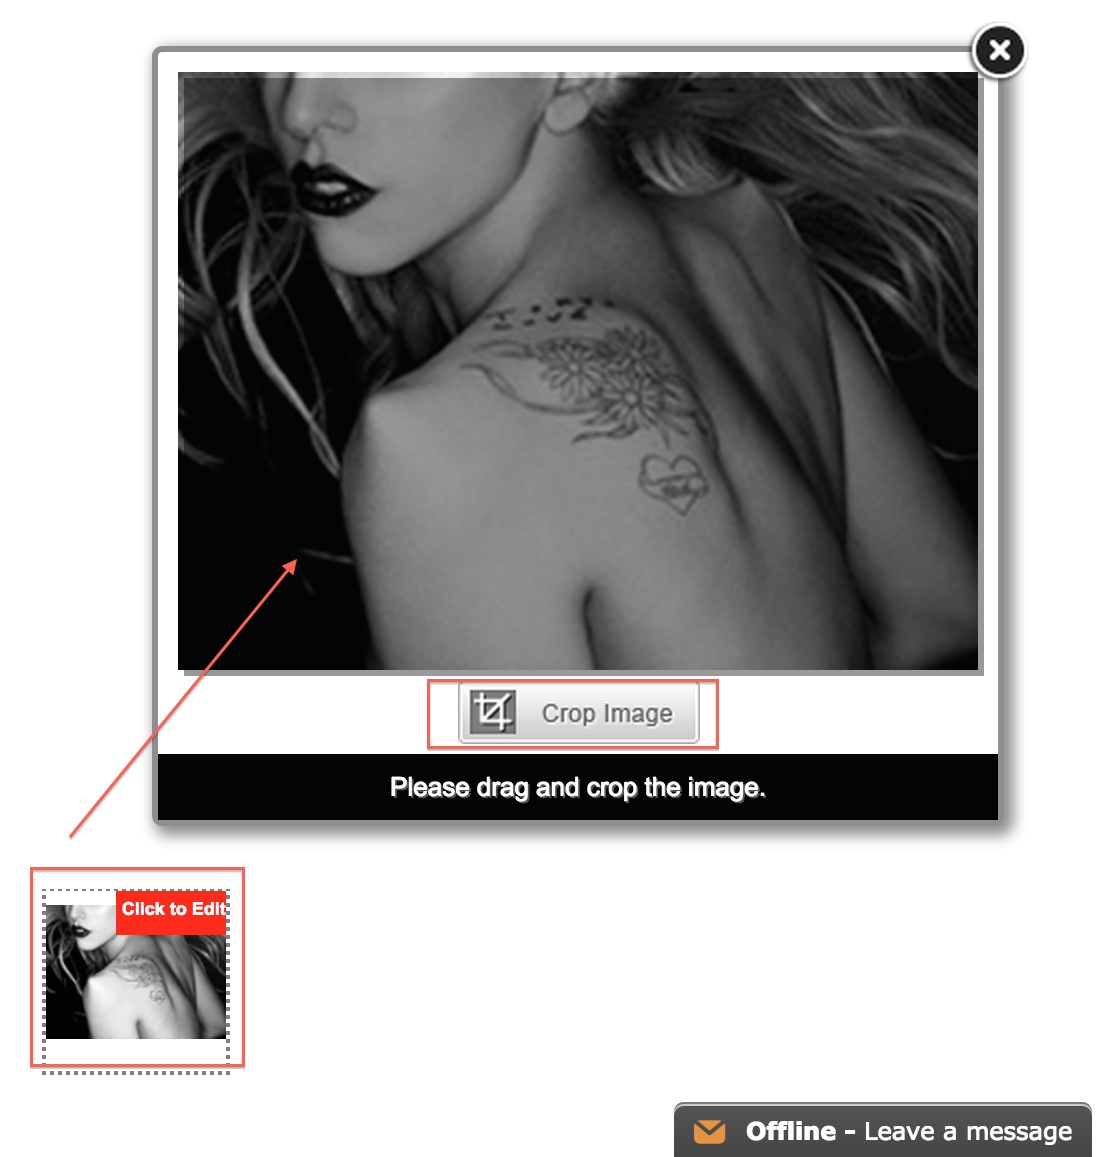
Step 3.2: Click on the Click to Edit button to crop your image. Drag the box to the area of the image you want to crop. You can also resize the crop area by dragging the corner of the box. Click on the Crop Image button at the bottom of the panel to crop the image.
Step 4: Click By Visiting a Webpage and enter your website url in Insert webpage/site URL text field.

Or you can click BY displaying a coupon code and enter the Coupon Code in Create your coupon code here.

Step 6: Click Create/Edit Email Message button. Enter the Email Subject, Compose an Email Content and click Done button.

Step 7.1: You can select any Pre-claim Options if you want the user to Tweet or Like your Facebook Page before they can claim their coupon. Select the Twitter Tweet button. A Tweet Button will appear at the bottom of the ad unit. Enter a Predefined Tweet for your users to tweet and click Done button.

Step 7.2: Select the Facebook Share button. Enter the url of your Facebook page for users to share and click Done button. Finally, click on the Save Changes button to save your changes.

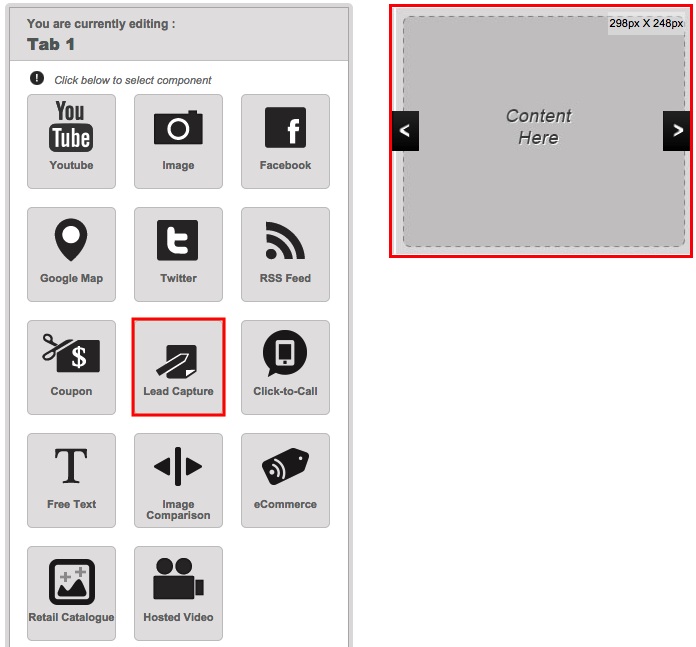
Step-By-Step: Lead Capture Form Component
Step 1: Click Lead Capture Form Component in the component selection.
Step 2.1: Click on Add New Field to add in a new component of data you wish to collect.

Step 2.2: After clicking on Add New Field, a pop-up box allows you to set the Field type, Label your field, Insert Placeholder Text and Make the field as required field. Click Done button

Step 3: Drag & Drop the component to re-arrange them into desired sequence. Click Edit link to edit individual field.

Step 4: Data can be submitted in three ways which you can choose. For Instant Email Notification, click Instant Email Notification and type your email address in Instant EmailNotification.

Step 5: Click Direct Submission and type the url of your site in Direct Submission text field.

Step 6: Type your desired success message in Message upon Successful Submission when the data submission is finished.

Step 7: Set the font color and styles then click Save Changes button.

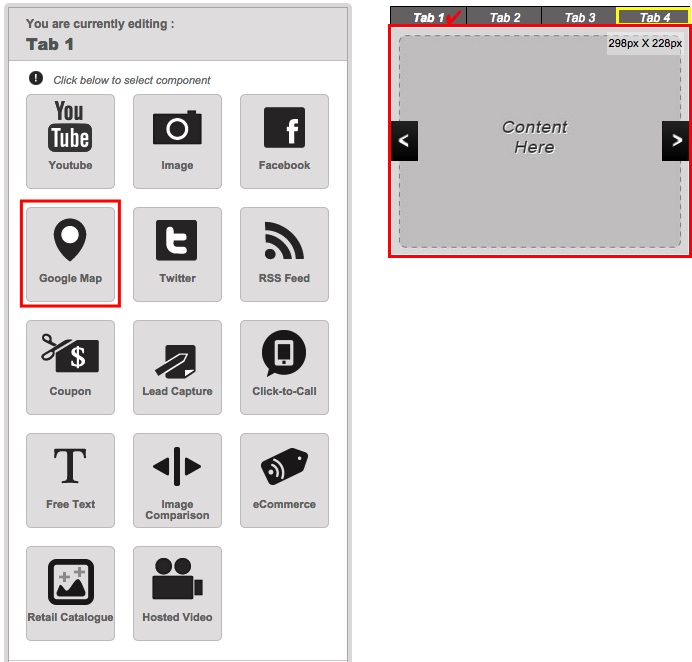
Step-By-Step: Google Map Component
Step 1: Choose Google Map Component in the component selection.
Step 2.1: Enter the Address of your location. The location will be shown in the map.
Step 2.2: Click on the Confirm Address button to save your changes. The address will be added to the Address List.

Add in more than one address into the list.
Or, remove any of the addresses in the list by selecting the address to delete and click Remove Address.
Step 3: Click Save Changes.

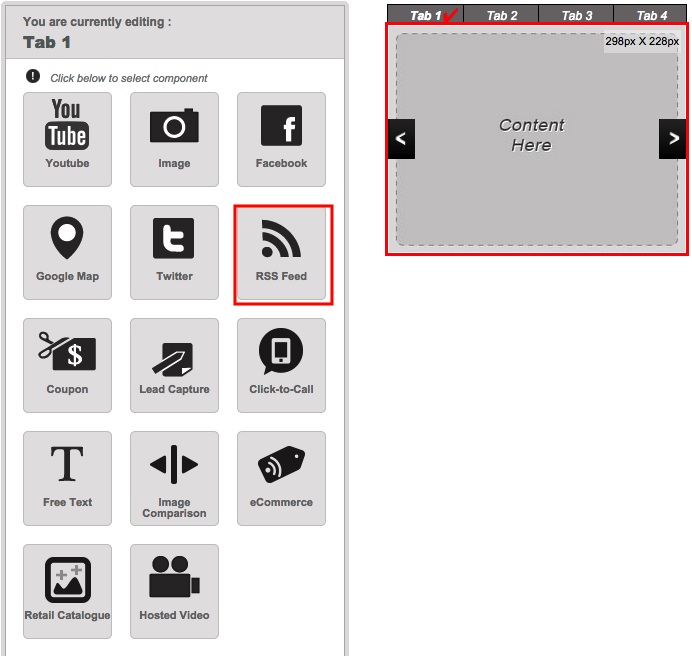
Step-By-Step: RSS Feed Component
Step 1: Select RSS Feed Component in the component selection.
Step 2.1: Look for the RSS Icon in your website.
Step 2.2: Right click on the RSS icon and select Copy Link Address, Copy Link Location or Copy Shortcut in the menu depending on what browser you are using.

Step 3.1: Paste the link address into the Insert your RSS Feed Url.
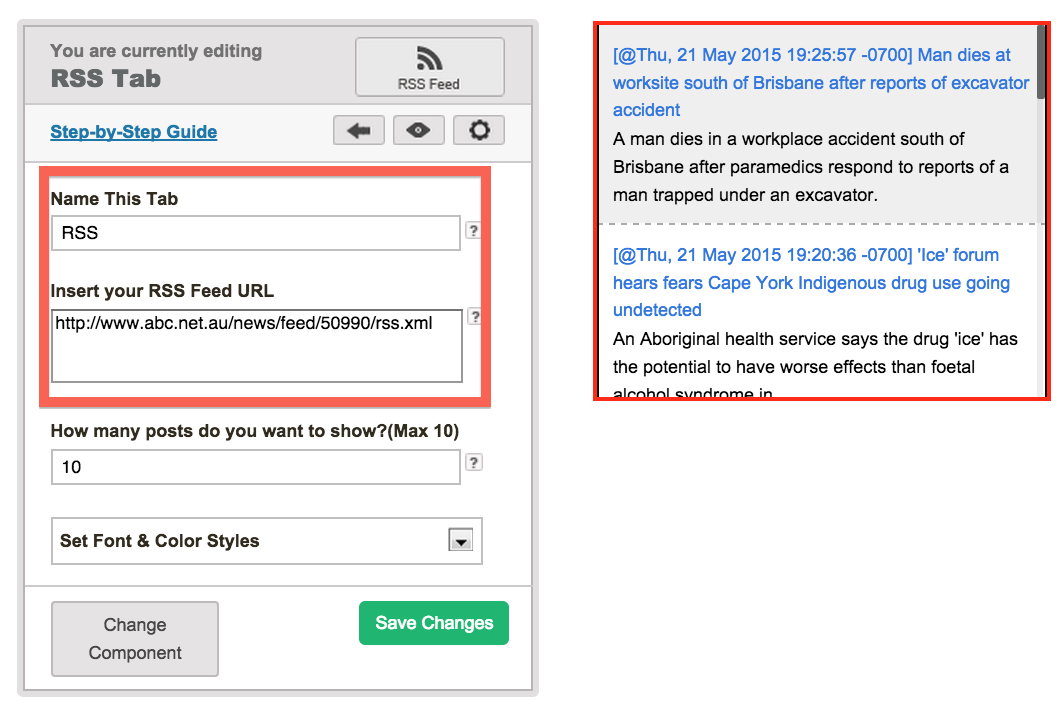
Step 3.2: Enter the Feed Limit to specify how many post/feed to display in the component. If entered 10, the latest 10 post/feed will be displayed.

Step 4.1: You may also customize the Background Color, Font Color or Font Size of the component to match your overall design. Finally, click on the Save Changes button to save your changes.

Can I upload my own video?
Yes, please visit Hosted Video for more information.
Step-By-Step: Hosted Video
Step 1: Choose Hosted Video in the component selection.
Step 2: Enter Name this Tab Caption. Click on Choose File.

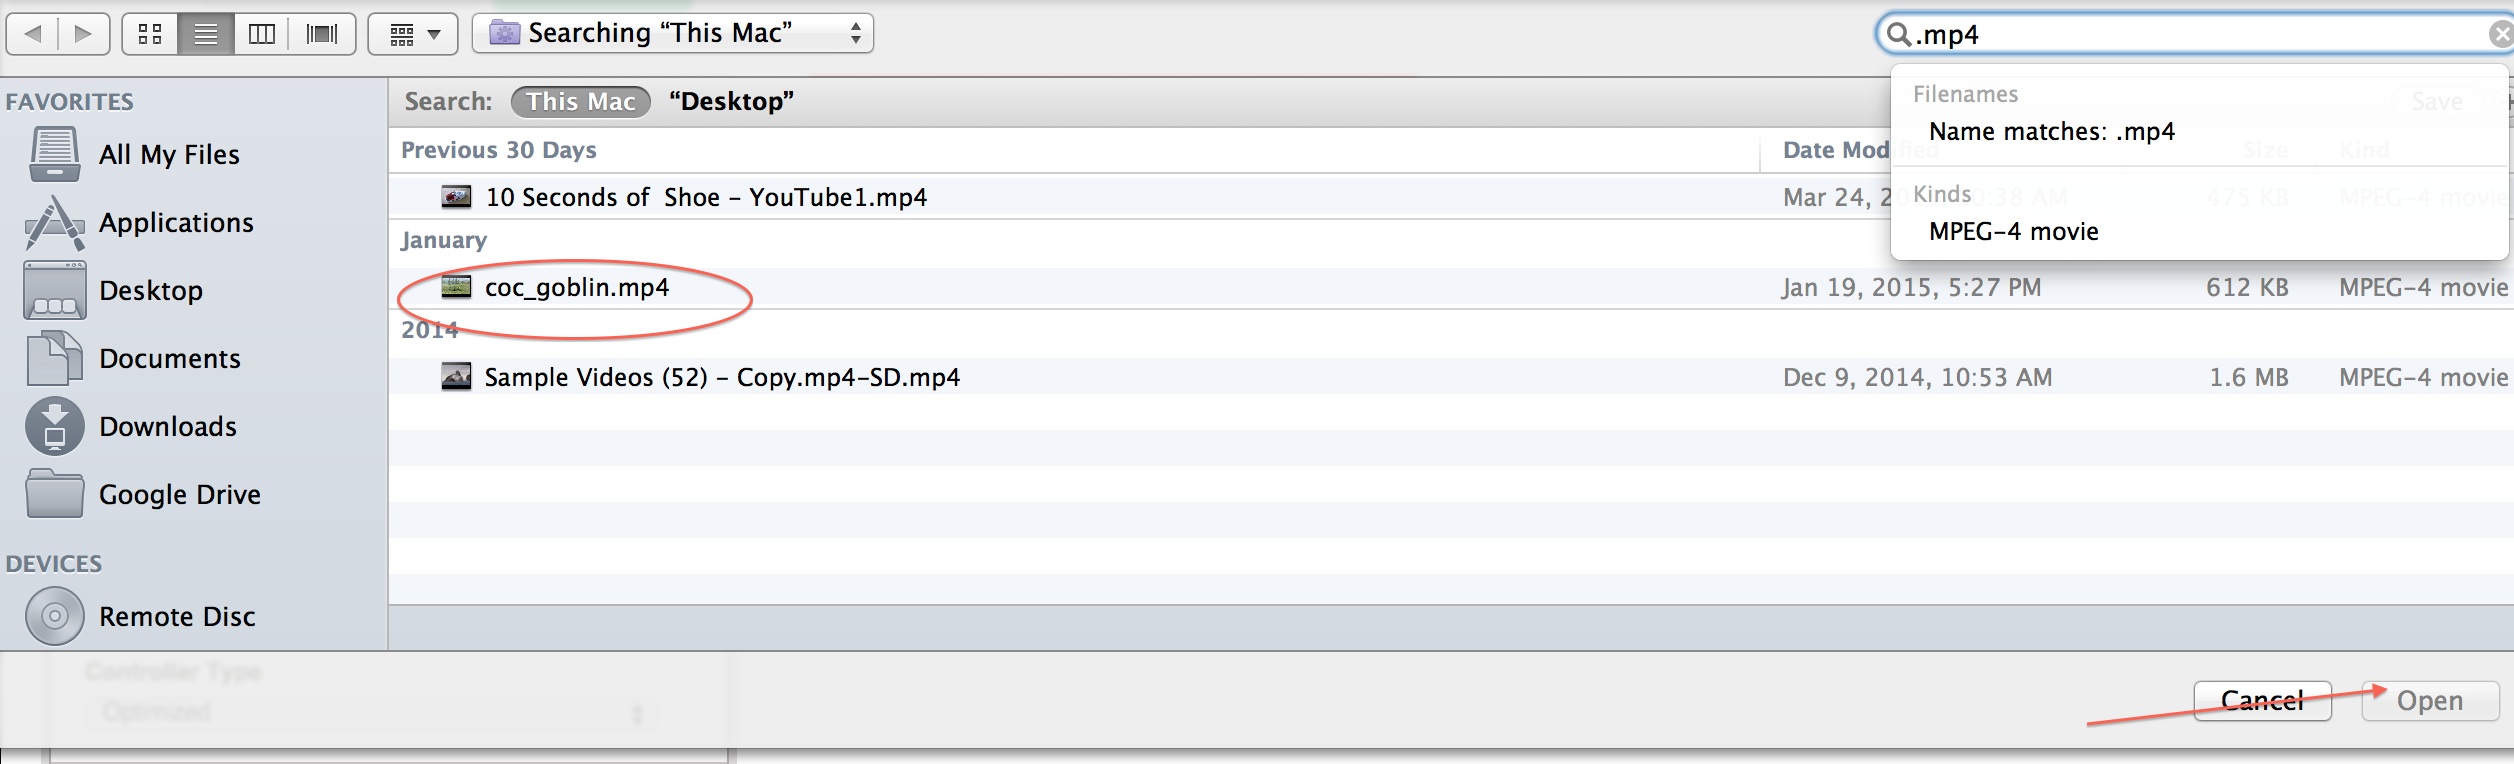
Step 3: Select the MP4 file and click Open. Then, the video will be uploading.
Step 4.1: Select either No Autoplay, Inview Autoplay or Autoplay.

Step 4.2: Select Optimized or Special from Controller Type.

Step 5.1: Click Upload an Image in Upload Cover Image.

Step 5.2: On Gallery, click Upload a File. Select an image and after upload click the uploaded image and click Add Selected File button.

Step 6: Upon clicking on the Cover Image of the ad, set the action to either 1) Play the Video or 2) Clickthrough to a landing page

Step 7: Type the Caption and click Upload Image to upload an Ending Image. Follow step 5 in uploading image.

Step 8: Type the Landing Page Url and click External Tracker.

Step 9: Click External Tracker, click Image or Javascript Tracker. Enter the url for Play Event, 25% Completion Event, 50% Completion Event, 75% Completion Event and 100% Completion Event
![]()
Step 10: Click Save Changes button.

My Facebook Feed is not working.
Check if your Facebook Page ID is correct.
It should be either RichMediaAds from URL http://www.facebook.com/RichMediaAds or the entire URL itself.