Here’s a simple tutorial on how to create a simple Rich Media Ad using our Ad Creator.
Step 1: Click Ad Creator menu located at the top of the page. You’ll then be taken to the Ad Format & Template Selection page
Step 2: Next, select the Mobile Web tab, Embedded as the ad format and 300×250 dimensions. This will create a 300×250 Banner Ad for Mobile Website.

Step 3: We’ve prepared a lot of predefined templates for you to choose from. Let’s choose one from the bottom of the template list as shown in the screenshot. Just hover over the template and click on Select This button.

Step 4: After selecting template, you’ll be redirected to the the Ad Creator where you can start editing your Ad.
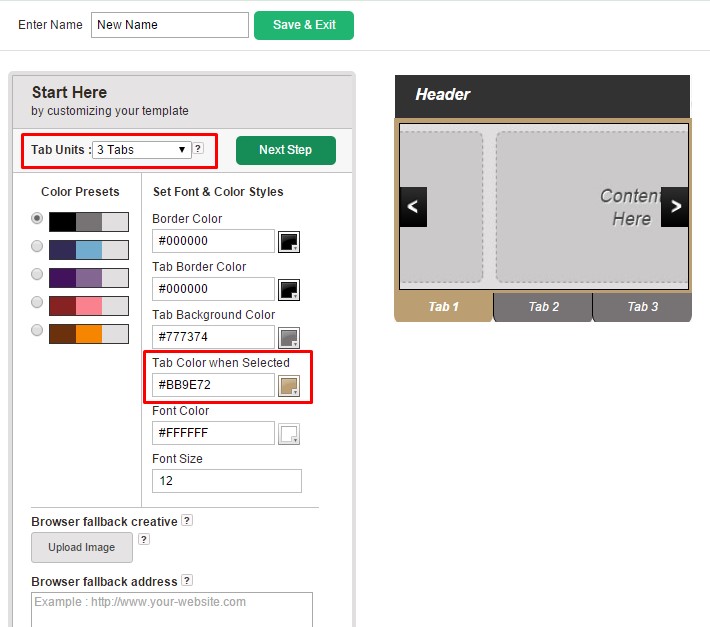
Step 4.1: In the Ad Creator, select the number of Tabs to show on your Ad. Let’s go with 3 Tabs.
Step 4.2: Next, we’ve defaulted some color presets for you. But let’s edit the Tab Color when Selected and change it to #BB9E72 as shown in the screenshot below.
Step 4.3: Once done, click on Next Step button to move to the next step.
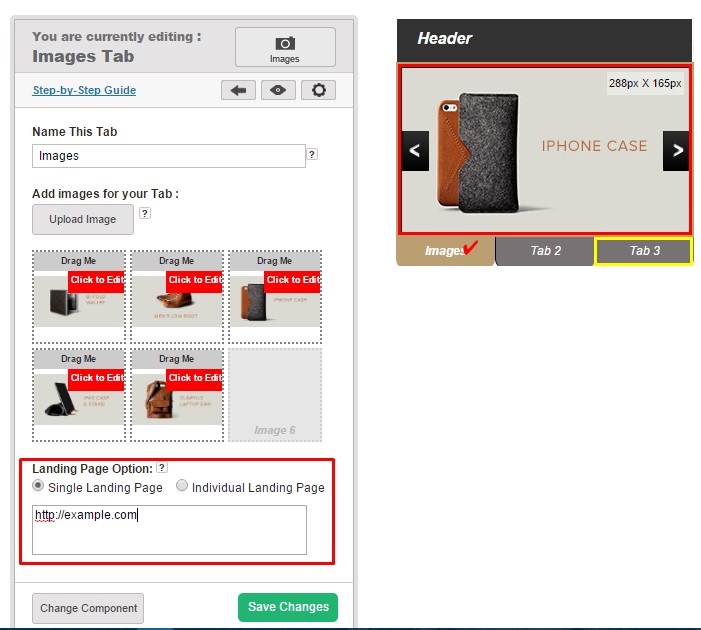
Step 5: Now it’s time to select the component to use for your first tab. Let’s use Image component for your first tab.

Step 5.1: Choose and upload images for your Image Component by clicking on the Upload Image button.

Step 5.2: We’ve uploaded some sample images that you can use for this tutorial. However, in case you do not see any images, you can download it from here (tutorial-assets) and upload it yourself. Then select the following images with the name image-01.jpg to image-06.jpg as shown in the screenshot below.

Step 5.3: Once images are selected, insert a landing page url (http://example.com). This is where the user will be redirected to when the images are clicked.
Step 6: Now you’re done with the first tab. Next, edit the second tab content by clicking on Tab 2 as shown below and select Youtube component for this tab.

Step 6.1: Insert a Youtube url that you can easily get from Youtube and you are done. For this tutorial, let’s use https://www.youtube.com/watch?v=CV8EBf_vqaw as your Youtube url.

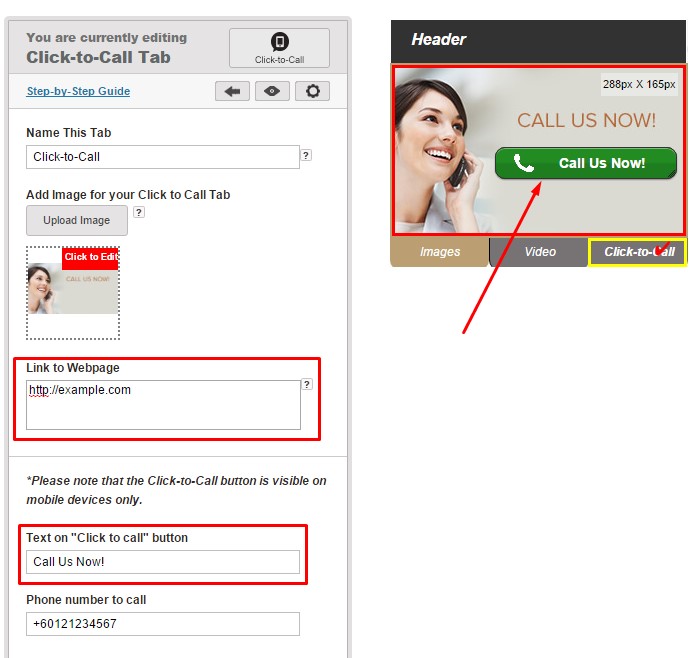
Step 7: Tab 2 was pretty easy. Let’s move on to Tab 3 by clicking on Tab 3 on the Ad as shown below. This time, let’s select Click-to-Call component.

Step 7.1: Next, click Upload Image button and select the following image that we’ve prepared.

Step 7.2: Next, insert a website url which the user will be redirected to when they click on the image. Again, let’s use http://example.com.
Step 7.3: You can change the text on the call button as well as the number that will be called when user clicked on the call button.
Step 7.4: Last but not least, you can also move the button to your desired position and even resize the button by dragging the bottom right corner of the button.
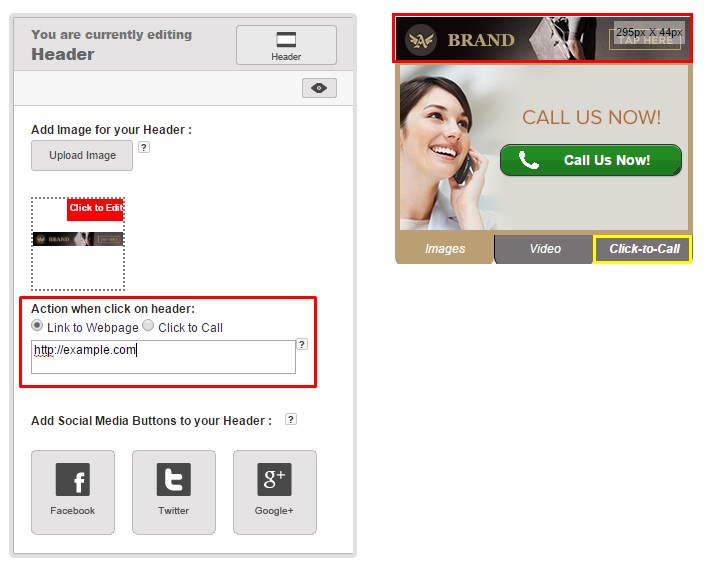
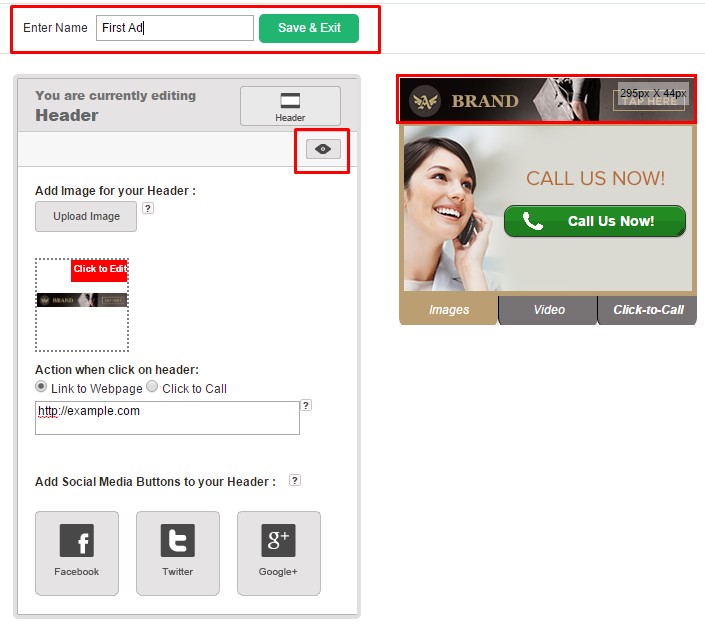
Step 8: Last part of this tutorial covers how to edit the header on your Ad. Click on the Header to edit it as shown below.
Step 8.1: Click on the Upload Image button to choose an image for your header. Choose the image named header.jpg.

Step 8.2: Then, insert a website url which the user will be redirected to when they clicked on the header. Use http://example.com for again.
Step 9: Now you’ve completed your first Ad. You can now click on the EYE icon to preview your Ad or give your Ad a name and save your Ad.
Step 10: When saving your Ad, you need to assign your Ad into a campaign. Simply create a new campaign and save to assign your newly created Ad into the campaign.

Step 11: You can also assign the created campaign to an Advertiser or you may skip this step for now.

Congratulations! You’ve created your first Rich Media Ad.
I hope the tutorial is easy to follow and give you better understanding on how to create your own Ad.
Next, you may learn how and where you can use this newly created Ad.
If you encounter any issue while during the tutorial or have further enquiries, please contact your account manager or send us a message at [email protected].